How to Replace a Kitchen Sink Base Cabinet
Kitchens are one of the most used and well-loved parts of a house. Whether you’re the type to cook up a storm or rarely cook at all, kitchens often become a place where friends gather, conversations are had, and life is lived. Since it’s used so much, it’s important to keep this area of your house up to date, functional, and beautiful.
If it’s time to replace that kitchen sink base, you’ll be glad to know the job is doable as long as you follow a few straightforward steps:
- Measure for New Cabinetry
- Pick a New Vanity Cabinet
- Gather Tools
- Turn Off Water
- Remove Old Vanity Cabinet
- Assemble New Vanity Cabinet
- Fit and Attach Cabinet
- Place Doors and Drawers on the Cabinet
Though this certainly isn’t a thirty-minute job, it’s not going to take you an entire week, either. As long as you familiarize yourself with the steps to properly fit a new cabinet and gather all the tools you’ll need, your project should be a success.
What is a Kitchen Sink Base Cabinet?
When you’re getting ready to remodel, update, or build your kitchen from the ground up, one of the biggest decisions to make is the type of kitchen cabinet sink base you’ll install. Naturally, this under the sink cabinet should match the rest of your kitchen cabinets as well. The reason why it’s a base unit is because this is the portion that goes directly under the sink and countertop.
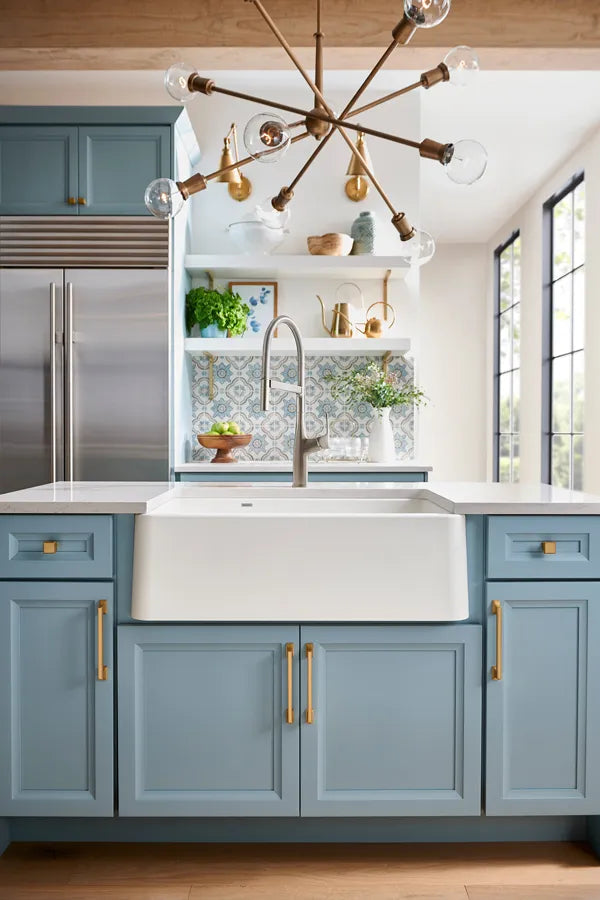
Whether you install a deep farmhouse sink, a split option, or a unique shallow version, the cabinets that go underneath the sink and the adjoining countertop are your base cabinets. The cabinets to the side of the sink can also be considered base cabinets because they connect directly to the cabinet under your sink and will usually form the base to your countertop and work surface.
When talking about cabinets, it’s handy to distinguish base cabinets from floating cabinets to make it clear which area of the kitchen layout you’re working on and which products you need to order. Use this language with your contractors, as well, to make sure you’re on the same page when discussing the different parts of your remodeling project.
What Size is the Average Kitchen Sink Base Cabinet?
Kitchen sink base cabinet sizes will vary depending on sink sizes, the size of your kitchen, and the amount of room you plan to dedicate to your sink and work surface areas. However, there are some general guidelines and standard sizes you can expect to run into when ordering cabinets for your remodeling project. The typical sizing you can purchase without having to custom order include:
- 72 inch kitchen sink base cabinet
- 60 inch kitchen sink base cabinet
- 48 inch kitchen sink base cabinet
- 36 inch kitchen sink base cabinet
- 30 inch kitchen sink base cabinet
- 24 inch kitchen sink base cabinet
Naturally, the size you’ll need to order will depend on the space you have dedicated for your kitchen sink. Another factor to consider when choosing a kitchen sink base cabinet is the style of your sink. A farmhouse apron-front sink base kitchen cabinet, for example, will typically require a larger sink base kitchen cabinet than the base for a standard-sized sink. A kitchen corner sink base cabinet will also require unique measurements based upon its positioning and sizing.
How to Replace a Kitchen Sink Base Cabinet
Now that we’ve gone over what a kitchen sink base cabinet is and the most popular sizes, let’s go over the project details for installing a new one:
1. Measure for New Cabinetry
When you measure for a kitchen remodel, it’s critical to keep every measurement the same. So, find out whether your contractor or supplier is using centimeters or inch-based measurements. If your measurements get mixed up, even standard sizes will be out of alignment once the final unit arrives. Make sure you’re on the same page with your supplier or contractor at all times.
When measuring, you’ll want to take several measurements into account, including the height, length, and width of your corner cabinet or squared-off cabinet space. If you’re using a computer program to provide a finished representation of what your cabinetry ideas look like before ordering, make sure you enter the exact measurements into the program for an accurate diagram. It’s also a good idea to specify the type of wood grain or material the sink cabinet is made of, as the amount and cabinet material type will impact the total cost.
2. Pick a New Vanity Cabinet
Now comes the fun part! Choosing new kitchen base cabinets is where you get to put your creativity to work. Asking yourself some key questions when it comes to how you utilize your kitchen will go a long way in helping choose your new base wall cabinet.
Do you utilize each drawer to maximize your organizational capabilities? If yes, you’ll want to look at a drawer base cabinet.
Do you want to access items easily in your corner unit, rather than use the space for long-term storage? If so, then consider adding a lazy Susan to your cabinet box to ensure all items easy to reach.
Do you want to maximize the storage space? Consider adding retractable storage baskets that are the same size as your shelf width and depth.
Are you outfitting your home for tall occupants? Consider bumping up your wall height cabinet measurements by six inches so your countertop and cabinets are easily accessible to taller individuals while still within reach of any new occupants later on.
Take these questions into consideration as you plan, then choose your finished product based on the overall look of the vanity, door style, and function of the cabinets.
Always choose a vanity cabinet that best serves your specific needs. If you’re planning to add a kitchen island into the mix, consider choosing your kitchen island pendant lighting at the same time you choose your cabinets to make sure everything coordinates.
3. Gather Tools
When you’re getting ready to install your kitchen cabinet, it’s always a good idea to make sure you’re fully prepared. This means gathering all needed supplies ahead of time. While this list isn’t exhaustive, it gives you a general idea of the tools you’ll need to install your base cabinet.
- Levels: To make sure your cabinetry is level from the sink base to the rest of your cabinets.
- Tape Measure: To measure the area of the sink base cabinet, face frame, and cabinet door spaces.
- Power Drill: To drill pilot holes and screw in the cabinet to the studs on the walls.
- Drywall Screws: To secure your cabinets into areas of the wall where there is drywall.
- Toe Kick Wood Pieces: To install a toe kick under your kitchen sink cabinet. This material can be made out of plywood or wood to match the rest of your cabinets.
- Pen/Pencil: To mark the wall where studs are located, in addition to the measurements for cabinetry.
While this can certainly be a one-person job, it will go much faster if you have an extra pair of hands to help measure, drill, and install your new cabinets.
4. Turn Off Water
When you’re getting ready to remove your old cabinets, you’ll want to turn off the water at the whole-house water connection. This ensures that you can take the old sink apart, remove cabinets, and detach pipes without a geyser erupting from your water pipes.
When working on projects of this nature, always turn off the water for the whole house rather than simply shutting it off at the sink site.
5. Remove Old Vanity Cabinet
To remove your old vanity cabinet, you’ll need to remove the flooring where the pipes come up, unscrew the backing, and remove the cabinetry, section by section. This might require some demolition work, depending on how your cabinetry was installed in the first place. You’ll need to remove your countertops and sink before removing the base cabinets, as well.
Once your countertops and sink are removed, unscrew the base from the wall and carefully shimmy it away from the rest of the cabinetry. Go section-by-section for this, starting at one side and moving methodically through each piece until the entire section has been removed.
Courtesy of Blake Miller Homes and 2021 Utah County Parade of Homes
Your new vanity may require some assembly, and at this point, you can start that process. As you put it together, set doors and drawers aside to install later. By leaving doors and drawers off until your cabinets are installed, you’ll be able to freely move in and around the cabinet during the installation process. After you assemble the rest of the unit, all you should have left is placing the drawers inside their tracks and mounting the doors onto the front.
Be sure to follow all the instructions that come with the unit. At Vevano, we include step-by-step specs and instructions to make this process as simple as possible.
7. Fit and Attach Cabinet
Now it’s time to fit your cabinets into place and attach them to the walls. As you place them in their proper locations, use a level to make sure each cabinet is square. If it isn’t, you may need to use a few shims underneath the cabinets to level them out. Never install a cabinet that isn’t square.
When each cabinet is level, screw it into the wall with drywall screws or into studs with wood screws. Just as when you removed the cabinets, you can start at one end and work your way to the other. Alternatively, the corner unit is a good place to start, as it usually fits within a precise measurement and shouldn’t vary more than an inch or so.
Once your cabinets are all installed, it’s time to add the finishing touches.
Place the drawers on the tracks you already installed during assembly. Finally, add the doors to the pantry cabinets and base cabinets and you’ll see your kitchen design come together.
If your cabinets didn’t come with a toe kick, you’ll want to install one of your own to finish off the new look in your fresh kitchen space.
Enjoy Your New Kitchen Cabinets for Many Years to Come
Though replacing kitchen base cabinets isn’t a job for the faint of heart, the project is altogether doable as long as you have a little DIY know-how up your sleeve. With the right measurements, a little help from our friendly Vevano customer service representatives, and some good old-fashioned elbow grease to move the old cabinets and insert the new, your kitchen will look like a million dollars in no time.
Now, it’s time to take a step back and admire all your hard work! Take some time to assess where all the items in your kitchen should go for ease of access. After you put everything where it needs to go, step back and admire your hard work. Once you see how amazing a set of new cabinets make your kitchen look, you might just wonder why you didn’t tackle this DIY project sooner.


